

When you are setting up a freshwater planted aquarium or building a detailed aquascape, you will eventually encounter a unique group of flora known as epiphytes. If you are just starting out, checking out a comprehensive freshwater aquarium setup guide can help you lay the right foundation for your entire ecosystem.
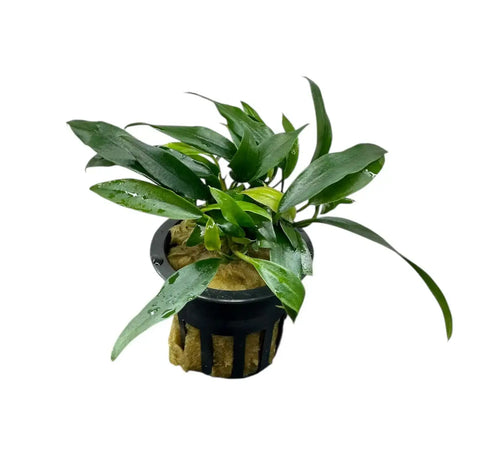
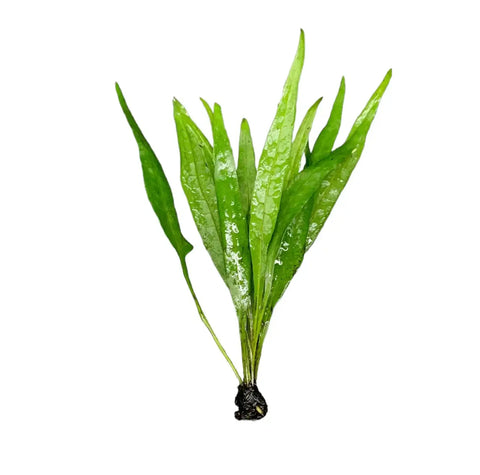
Unlike traditional background or carpeting plants, epiphytes—including fan-favorites like Bucephalandra, Anubias, and Java Fern—do not get planted into aquasoil, sand, or gravel. In nature, they grow attached to the surface of river rocks and fallen logs.
If you bury their horizontal creeping stems (called rhizomes) under the substrate, you suffocate the plant tissue and invite anaerobic bacteria to rot the entire specimen away.
So, how do you keep these plants securely attached to your driftwood or rocks without them constantly floating to the top?
While you can use traditional methods like black cotton thread or fishing line, the absolute cleanest, fastest, and most reliable method used by professional aquascapers is aquarium glue.
In this ultimate guide, we are breaking down everything you need to know to safely use glue in your tank, how it works, and a step-by-step tutorial for flawless placement.
Is Regular Super Glue Safe for an Aquarium?
The short answer is yes, but only if it is the right type:
- The ingredient list must be 100% Cyanoacrylate.
Cyanoacrylate is an acrylic monomer that cures incredibly fast when it comes into contact with water or moisture. Once it cures, it becomes completely inert, non-toxic, and 100% safe for sensitive freshwater fish, shrimp, snails, and live plants.
Liquid vs. Gel Super Glue
Always buy the Gel version (often sold as "Super Glue Gel").
Standard liquid super glue is thin and runny. If you try to use it on a plant, it will run down the leaves, drip onto your hardscape, leave massive white stains everywhere, and potentially glue your fingers together. Gel super glue is thick, holds its shape, stays exactly where you place it, and bridges gaps between uneven rocks and plant roots easily.
The "White Film" Phenomenon: Why Glue Turns White
When cyanoacrylate glue hits water, it undergoes a rapid chemical reaction called polymerization. This instant curing process forces the moisture out of the outer layer of glue, transforming it from a clear gel into a solid, bright white shell.
This is completely normal and harmless to your livestock, but it can look unappealing if a massive white blob is visible right on top of a beautiful piece of dark Malaysian driftwood or volcanic rock.
Our step-by-step method below is designed to hide this white residue completely beneath the plant itself.
Step-by-Step Guide: How to Glue Epiphytes to Hardscape
You can use aquarium glue whether you are building your layout completely dry outside of the tank, or working on a tank that is already filled with water.
Step 1: Prep the Plant
Take your Bucephalandra, Anubias, or Java Fern and inspect the rhizome. Trim away any dead or decaying leaves using sharp aquascaping scissors. If the root system is incredibly long and tangled, you can safely trim the thin roots down to about half an inch. This makes the plant much easier to position and actually encourages it to throw out fresh anchor roots to grip the hardscape naturally.
Step 2: Dry the Contact Points
Take a clean paper towel and gently pat dry the underside of the plant's rhizome or root base. Next, pat dry the exact spot on the rock or driftwood where you want the plant to live.
While cyanoacrylate will bond to wet surfaces, creating a dry contact point creates an incredibly strong initial bond and prevents the glue from forming a slippery white skin before it actually touches the wood or rock.
Step 3: Apply a Pinpoint Drop of Glue Gel
Apply a very small dab of super glue gel directly to the underside of the plant's rhizome or its dense root cluster.
-
Remember, less is more. A tiny dot the size of a match head is usually more than enough to anchor a medium-sized plant. If you use too much, it will squeeze out of the sides when pressed down, creating an ugly white border.
Step 4: Press and Hold
Quickly press the plant firmly against the designated spot on your hardscape. Hold it securely in position without moving your fingers for 10 to 15 seconds. Because the moisture inside the wood or plant tissue instantly activates the cyanoacrylate, the bond will lock into place almost immediately.
Step 5: Mist and Cure
If you are working outside of the tank on a large aquascape layout, lightly mist the newly attached plants with water using a spray bottle. This keeps the epiphytes hydrated while ensuring the glue finishes curing completely. Once the glue is firm, you can submerge the hardscape right into your aquarium.
Can You Glue Plants Directly Underwater?
What happens if your tank is already full of water, and a piece of your favorite imported Bucephalandra snaps off and floats away? You do not have to drain your tank to fix it. You can glue plants directly underwater.
Here is the secret technique to do it safely:
-
Take the loose plant out of the water and pat the rhizome dry with a paper towel.
-
Apply a slightly larger dab of super glue gel onto the dry rhizome.
-
As soon as you place the plant back into the water, a thin white skin will instantly form over the glue blob. Do not panic.
-
Push the plant firmly into the target crack or rock surface underwater and twist it slightly. This twisting motion breaks the thin outer skin of the glue, exposing the fresh, uncured gel inside directly to the rock.
-
Hold it firmly against the rock for 20 to 30 seconds until it locks in place.
3 Pro-Tips for a Flawless, Invisible Bond
To keep your display tank looking professionally designed and clean, keep these three advanced aquascaping tips in mind:
-
Hide Glue in Cracks and Crevices: Instead of gluing a plant directly to a flat, exposed surface, look for natural splits, cracks, and pits in your dragon stone, lava rock, or driftwood branches. Tucking the roots into a crevice hides the white cured glue entirely from view.
-
The Moss Method: If you accidentally use too much glue and a bright white spot is staring back at you, take a tiny clump of live Java Moss or Christmas Moss and gently press it directly onto the wet glue spot. The moss will quickly attach, grow over the blemish, and camouflage it beautifully within a couple of weeks.
-
Use Porous Hardscape: Super glue creates a mechanical bond. It works incredibly well on highly porous textures like lava rock or rough driftwood. It struggles to hold long-term on perfectly smooth, slick surfaces like polished river stones.
Freshwater Aquarium Care Guides
Shop related: Aquatic plants, Epiphyte Aquatic Plants, Aquarium Glue, Driftwood.
Other blogs: Why are my aquarium plants dying - top 5 mistakes that kill plants, Can aquarium plants grow in sand, Do aquarium plants really need injected co2 and strong lighting, Why are my aquarium plants losing leaves.